Magento is a global leader in open source e-commerce platform with over 250,000 merchants. It is written in PHP and built on the Zend framework and uses MySQL relational database management system. However, it requires high specs, so one cannot get the desired performance if hosted on a shared hosting. GoDaddy does not recommend hosting Magento on shared hosting but on VPS, dedicated or on their cloud servers.
One can use other cloud services such as Amazon Web Services or Google cloud platform but we will stick to Godaddy cloud platform. One of the advantage I found in using GoDaddy cloud over other services is the ease of installation, and you are up and running in ten minutes. Bitnami helps to easily deploy a full Magento installation in GoDaddy cloud platform.
This post will cover how to install Magento on GoDaddy cloud server. GoDaddy gives a free 30 days trial and it is a great opportunity to test if GoDaddy is the right solution for you.
Creating New Magento Server

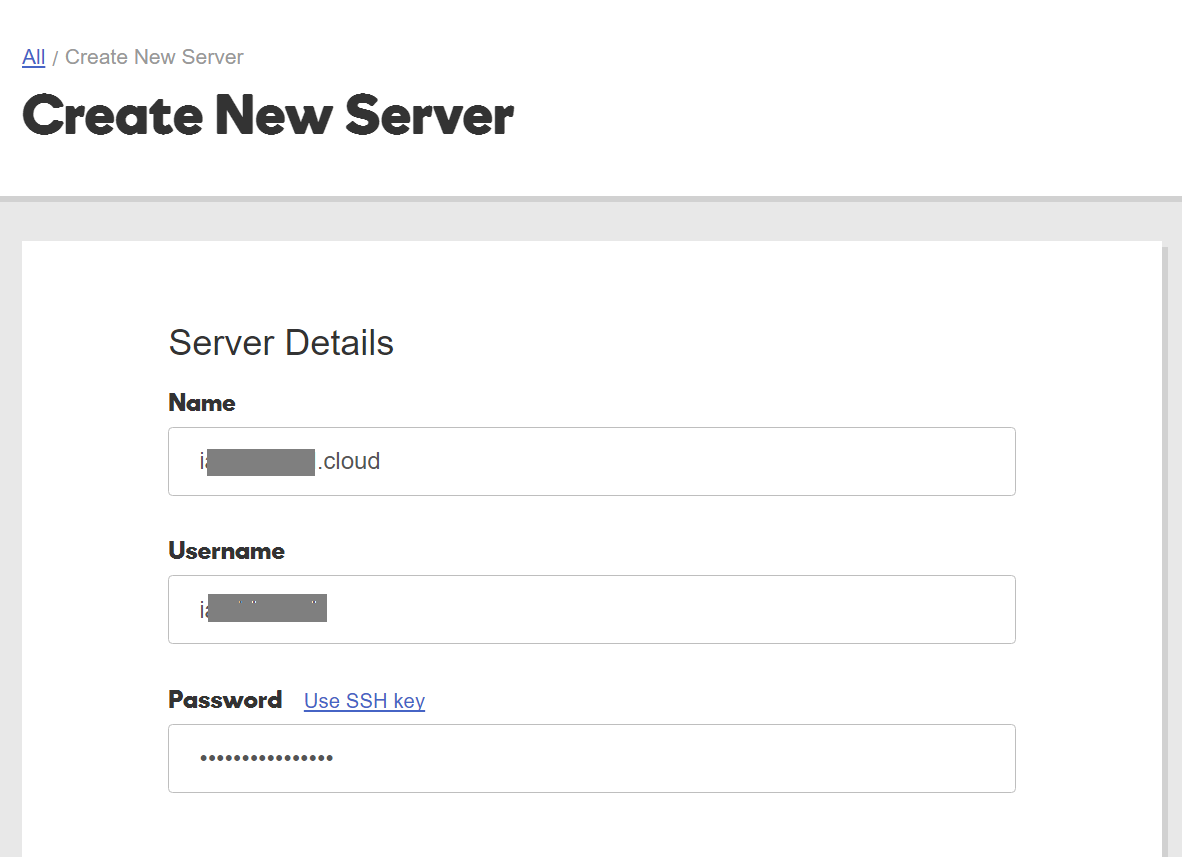
If you are not registered you will need to create an account with the GoDaddy and enter your credit/ debit card details. Once you click on Install Magento now, It will redirect to a page to Create New Server. Enter the name of the server that you are creating, a username and a password. Note down these details, as they are required in future to connect to the server as well as to transfer the files using a client such as FileZilla.
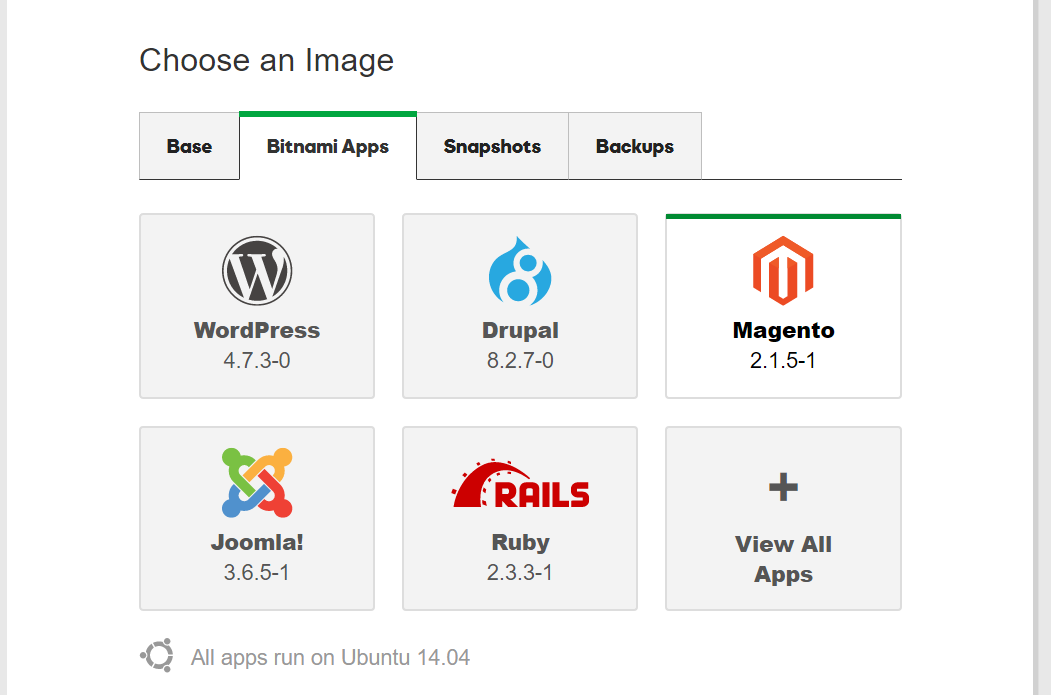
Bitnami provides options to set up differents apps on your cloud server. So once you enter the details to create a server, you can choose an image of the app that you want to set up. Since I am installing Magento now, I select the image for Magento as shown in the image below.
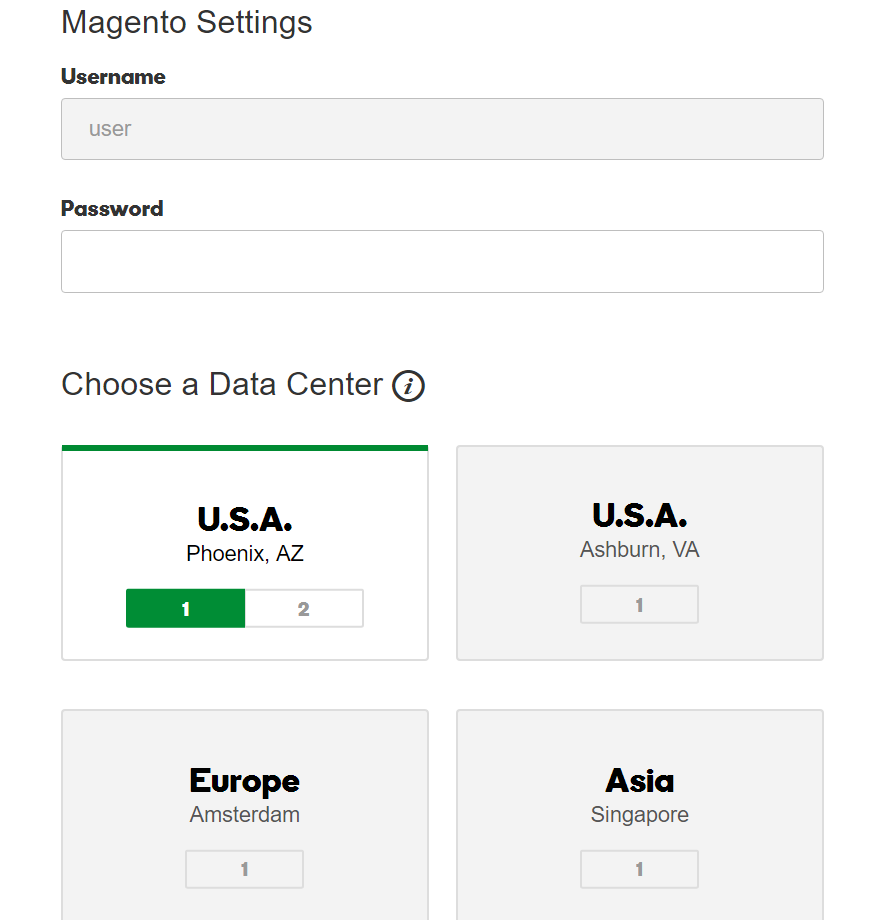
After I selected the image for Magento, I can enter the details for Magento settings. These details will be used to login to the Magento Admin dashboard. I also get to choose a Data Center.
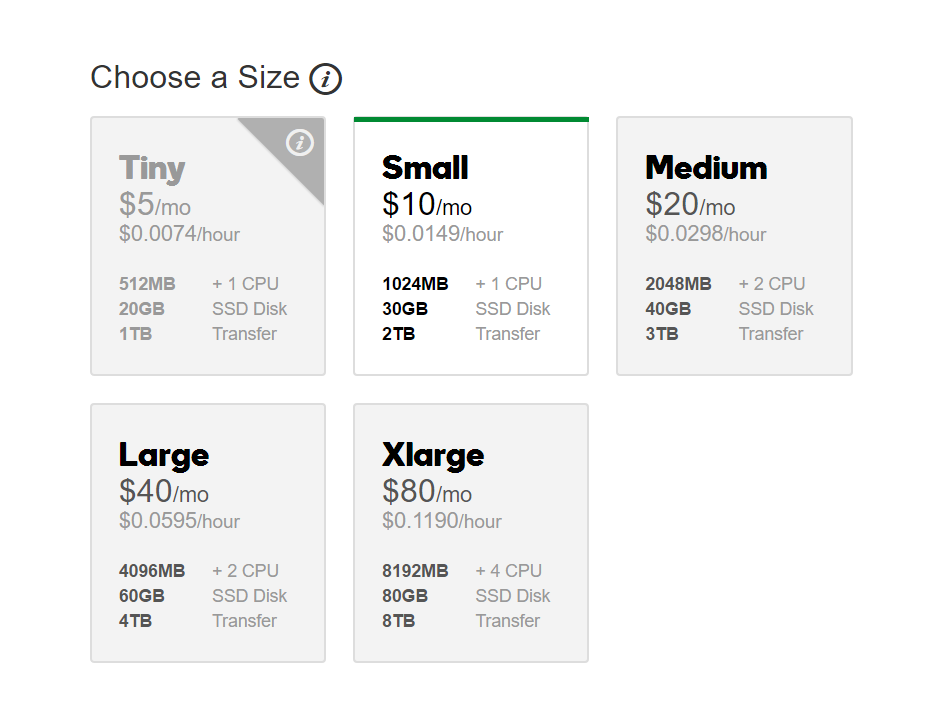
Next, I choose the size for my store depending upon my requirement.
Once done, click finish at the bottom of the page. It also gives more options to add dynamic IP addresses as well as to add automated backups. This creates a new server with Magento installed.
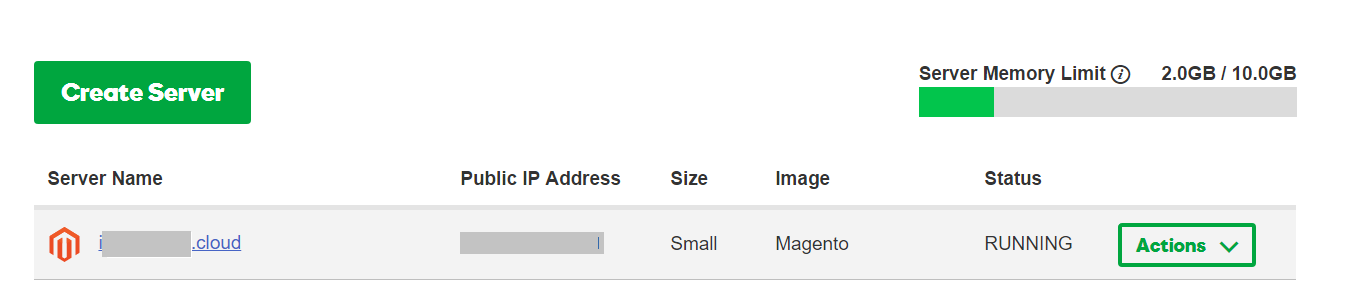
The image above shows that the server is created with Magento image and the status shows that the server is up and running. It is advisable to wait for ten minutes for the set-up to be completely finished before we perform any actions.
We can perform the following actions:
- Start or Stop the server
- Edit the name of the server
- Manage Server
- Manage the Magento Store
Manage Magento Store
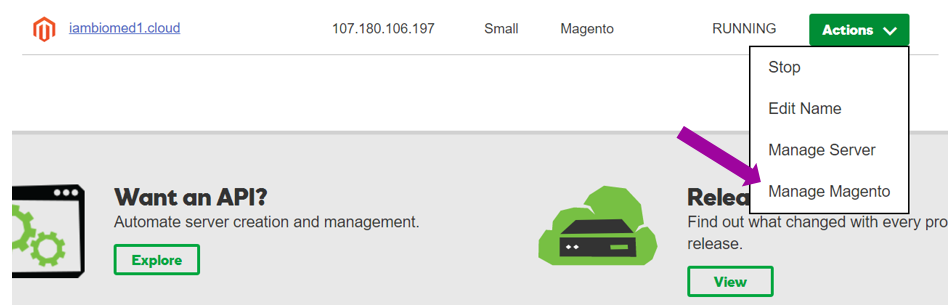
To view the store and the admin panel, click on the Actions button and then Manage Magento as shown in the image below.
Manage Magento opens up the login page for the admin panel.

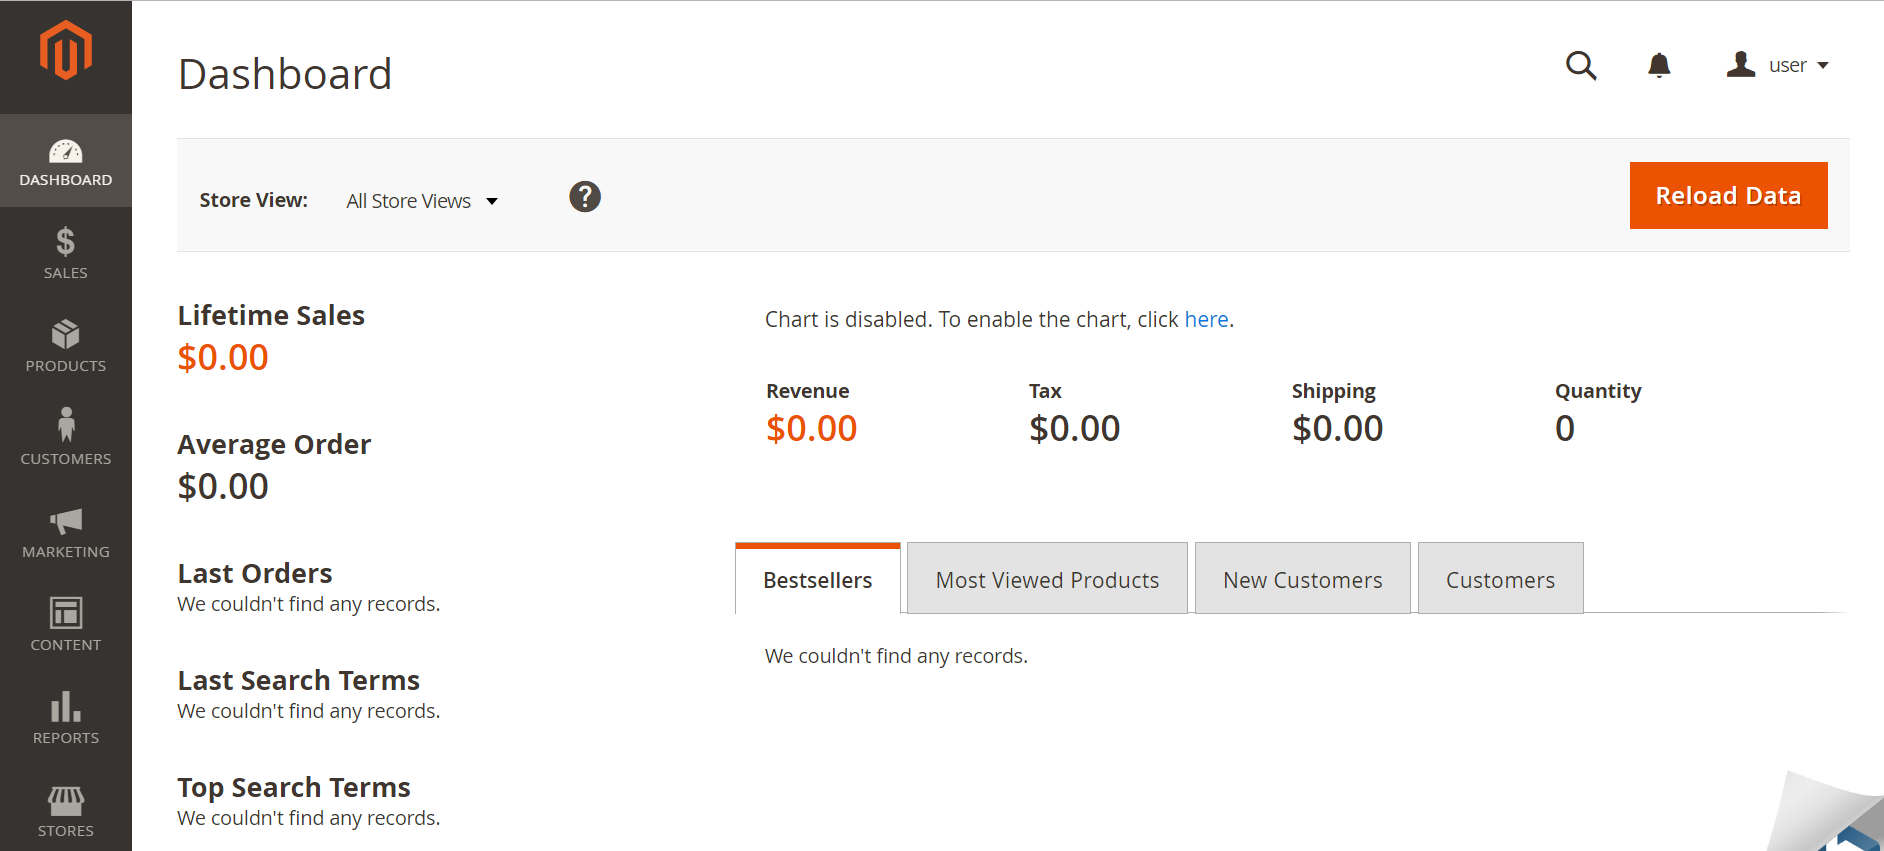
Enter the same login details that were entered for the Magento settings while creating the server. Signing up opens the admin dashboard of Magento.
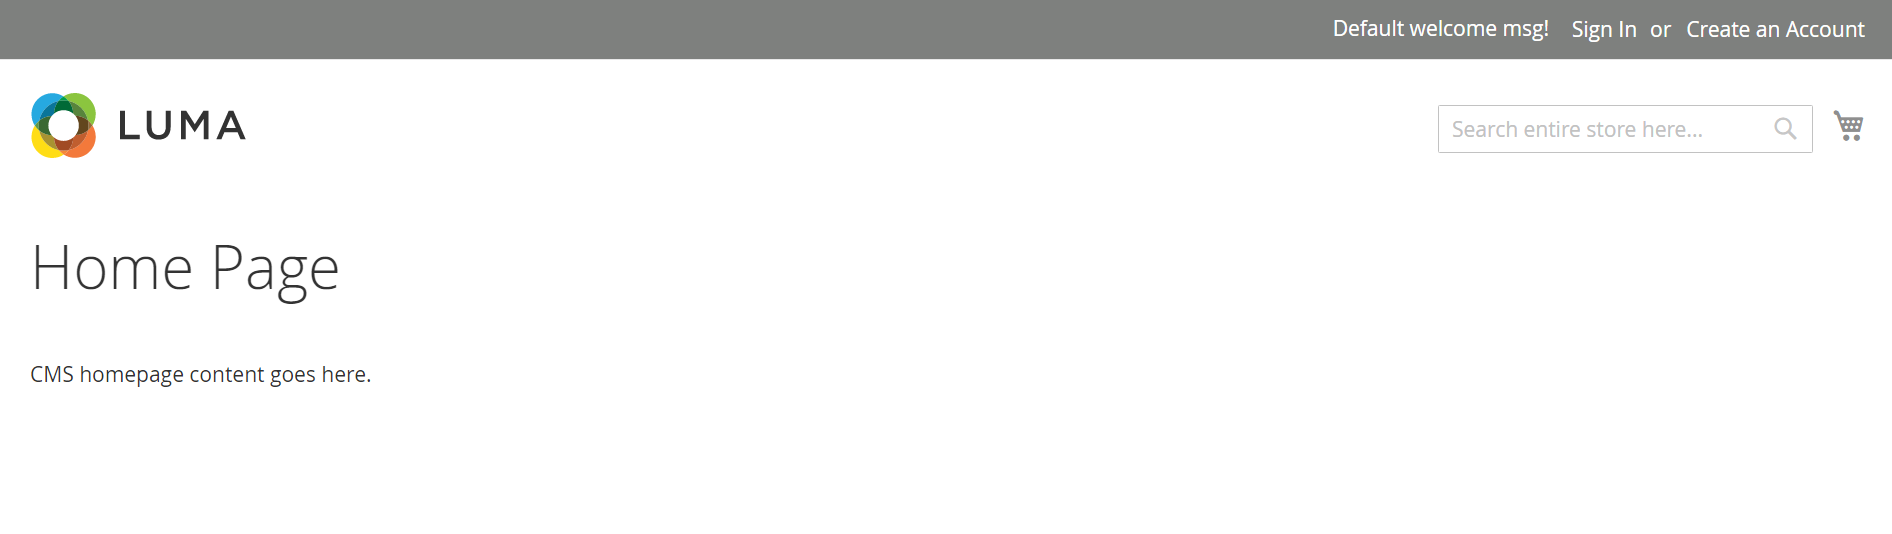
To view the homepage of the website click the user icon on the top right corner of this dashboard and select Customer View. Alternatively, you can also visit the website by entering the public IP address into the address bar of your browser.
The homepage looks as follows:
This is it! I hope this was easy. I look forward to know in the comments about your experience.
Tags: cloud server, e-commerce, godaddy, Magento