When I started learning React, I was introduced to the whole new world, new concepts, new tools, new types of files. For the first few days, I was overwhelmed by the amount of work that was required to build my first Hello World app in React. I had some respite when I came to know about the create-react-app boilerplate, and that’s how I came to know that there exists something called as Webpack.
I wanted to start building apps quickly. So, I made Webpack, Babel, and even Package.json wait for my attention. Now that I feel, I am comfortable with React, I decided to learn more in depth how they work.
Table of Contents
What is Webpack?
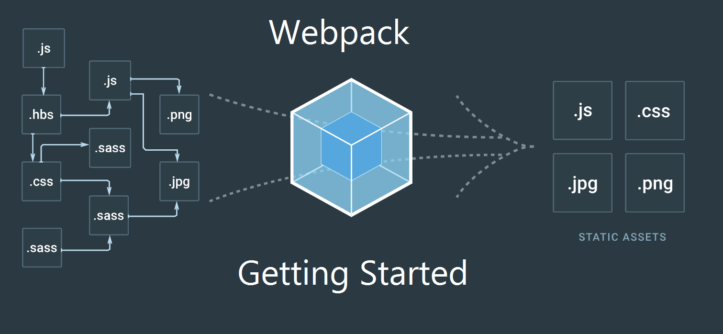
Webpack is a module bundler, and it is usually the first choice for the react developers and the community. Module bundling is the process of combining together a group of modules and their dependencies into a single file and in the correct order.
If you want to know more about the JavaScript modules, here is a link to a great article: JavaScript Modules: A Beginner’s Guide
Browserify, require.js are other module bundlers, but the Webpack has gained popularity in recent time.
Why is Module Bundling required?
Traditionally, we used to create a javascript file and then include it in the <script> tag inside the HTML file. And when there were multiple javascript files, we had to add multiple <script> tags. As a result, the browser had to load each file individually. Then we had concatenating the modules and minifying them together. And these things later evolved into module bundling.
Webpack can also bundle CSS, preprocessed CSS, images by utilizing the Webpack loaders.
Getting started with Webpack
I create a project directory and add a package.json file to its root using the npm init command. Next, I add Webpack to my newly created package.json file by using the following command:
npm install --save-dev webpack
My package.json file is now updated to include the webpack under devDependencies.
"devDependencies": {
  "webpack": "^2.5.1"
}
I will also install the webpack dev server using the following command:
npm install --save webpack-dev-server
Now, I need a webpack.config.js file. This file tells the webpack where to look and how to act. So I create a webpack.config.js file in the root of my project directory. I add the following content to this file:
I also create two folders “dist” (distribution folder) and “src and each of these folders will include a folder called “js“.
Then I add an index.js file inside the “js” folder of “src“. To begin, I keep my code inside this file simple.
console.log("hello");
My folder structure currently looks as follows:
I add the following content to webpack.config.js file:
/**
 * Created by Aditya Ekawade on 5/21/2017.
 */

var webpack = require('webpack');
var path = require('path');


var DIST_DIR = path.resolve(__dirname, "dist");
var SRC_DIR = path.resolve(__dirname, "src");

module.exports = {
    entry: SRC_DIR + "/js/index.js",
    output: {
        path: DIST_DIR + "/js"  ,
        filename: "bundle.js",
    }
}
In the code above:
- I begin by importing the required statements and I Specify the path for directories.
- This config file is going to be an object and we are going to have options for the build.
- Entry– We specify the entry file which is a simple path to the entry file. The entry file in our example is the newly created index.js files inside the src/js.
- Output– Path to the destination folder and the filename of the output file (
bundle.js) that will be created.
I also add an index.html file inside the src folder with the following content.
<html>
  <head>
    <title>webpack demo</title>
  </head>
  <body>
    <script src="/js/bundle.js"></script>
  </body>
</html>
I also do little changes in the script object of package.json. This creates a new script and when I run this command I run the webpack in the development mode.
"scripts": {
  "start": "webpack -d"
}
Next, I run the following command in my terminal:
npm start
If the command runs successfully it will show something like this in the terminal:
Also, a new file bundle.js is created inside the dist/js folder.
I will again make changes to the script tag of the package.json file and add the following:
"scripts": {
  "start": "webpack-dev-server"
},
Now, when I run npm start in my terminal, I can see that the server has started and the project is running at http://localhost:8081/.
In this post, I have covered getting started and the installation of webpack and webpack dev server. In the next post, I will cover the loaders.
Tags: es6, javascript, react, webpack


